Tuesday, July 15, 2014

The Elsa dress project

We all know Frozen is the biggest thing for almost everyone! One of my closest friends has two beautiful daughters and one has her 5th birthday party in July so I decided to try something I am still a very very amateur at. Sewing anything other then a toga, pillow case, or curtains. So you get the idea on my skill level. I was a month postpartum with my little one when I took the challenge of sewing a fitted velvet Santa suit for my youngest brother to travel in to Germany to surprise his girl friend. It was surprisingly a success even though I threw my sewing machine across the room when I flipped the table it was on. Word to the wise: postpartum hormones, plus huge project with deadline, and a sewing machine that kept breaking..... equals massive amount of pain in c-section scar but on the plus side it got me a brand new sewing machine. Ok fast forward 3 months and I get a wild idea to tackle an Elsa dress for a soon to be 5 year old. It was a great learning experience and I am beyond thrilled with the way it turned out so here is the fun project that took 3 full days to complete. Hardest thing was cutting the satin (huge fear of screwing it up) but once that happened I was sailing through with the help of YouTube on how to do a few stitches. I started with this pattern:
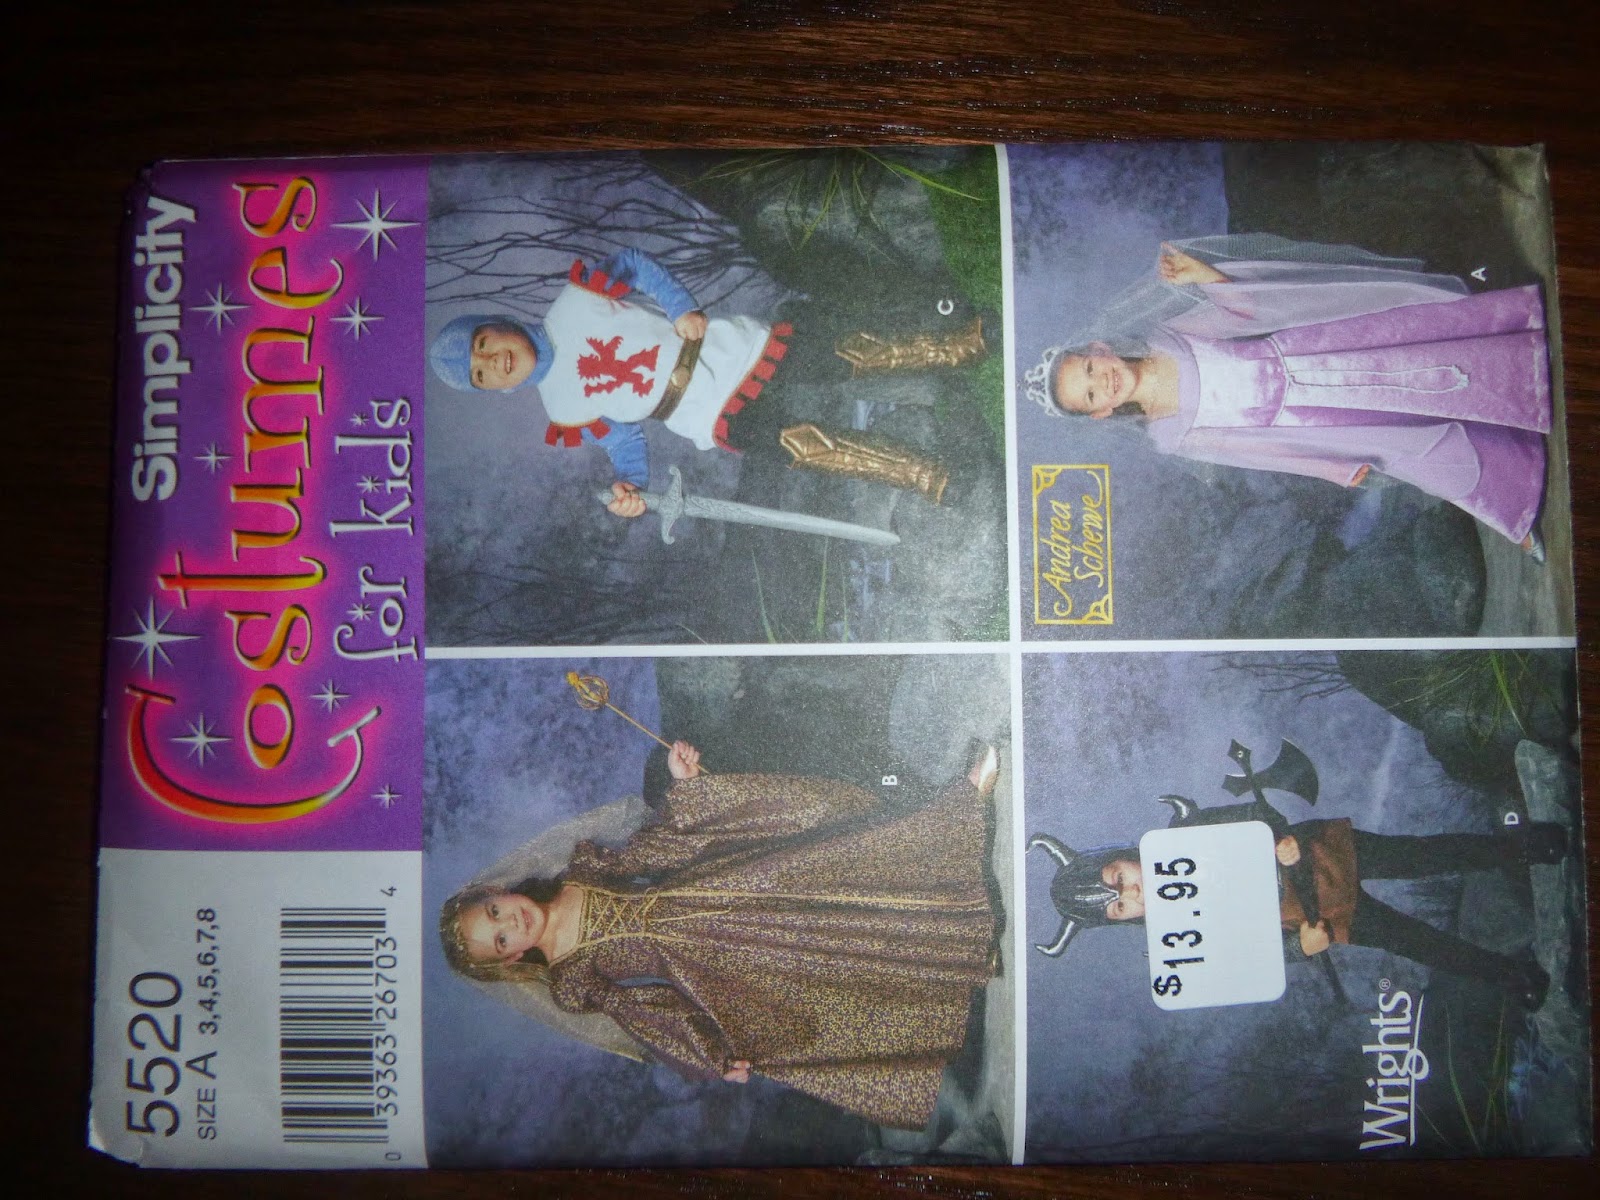
 I found Simplicity pattern 5520 I used dress A the purple on but used the sleeves from the boys costumes since Elsa's is form fitting.
 I made a size 6 dress cut out the paper pattern then cut the satin. I altered the back middle section instead of it being two separate middle piece for the zipper I made it identical to the front center panel. Here I laid out the front pieces so that I can pin the piece.
 Here how it looks after I pinned the front panels.


Close up of the pinning, yes I pinned the right sides up, this is so I could do the french seam, you can look that up on YouTube I found a super easy tutorial that I only had to watch once.


 I found sparkly blue tulle to cover the bodice. I sewed it into each panel so it had a smooth look. Not just floating freely over the panels. I doubled over the tulle with glitter sides together to keep it from flying off too much.


I used the 02 setting on my machine for a triple stitch.


 I was worried about the material I got for the cape and the sleeves that it would be too itchy and the strength of the material once I start sewing on it so I layered the satin below it.

 I treated the back the same way as the front. However, I sewed on velcro on each side of the middle panel. I am not great with zippers plus it is a play dress afterall.


 Sleeves went easy. Here is the rough dress before collar and the bottom hemmed. 


 Collar was awkward per the patterns instructions so I doubled the collar and sewed the pieces together and then to the the collar. I had to iron the collar so it fell properly.


 Close up of the top of dress prior to embellishments.

 I sewed snowflake buttons on to the satin sash I made, and found a nice big snowflake pendant for the collar.

 The cape had me scratching my head for a couple of days. I had no idea how to make the shape so I laid the dress down spread out the entire bottom and made that my pattern for the dress. Below I took the scrap sating from the dress and used it as the border for the cape. I folded the satin over the sheer material and pinned it as you see below so the seams were clean.
I secured the cape with Velcro so that it can be removed as needed or when twirling in a pretty dress is needed.


 Final product. LOVE how great it turned out.

It was a huge hit! She love love love the dress when she opened.

Built in Kennel

Having a small dog is wonderful for many reasons, I could list all those reasons or show you the coolest benefit of having a small dog. When we bought our house a year ago it was my goal to have a permanent solution to not having to keep relocating Roxy's kennel. The front entrance to the house has a weird corner and once I saw it I knew what had to happen, now it was time to convince my husband.


The above mentioned weird corner.
Bought a base cabinet from Home Depot the ones they have that are unstained which saved us about $100+ per cabinet we bought. My husband stained the cabinets with ease he followed the directions on the can and it didn't take much to do it. But beware that it takes a couple days to a week to stain it properly and put a protective coat on it.

Knocked out the center of the door and picked a decorative garden wire from Garden section $1.88. Cut it to size and secured it in to the door. Below you will see the finished door. 


 The counter top is a pre-cut piece we found that we liked and we cut it at home to fit perfectly. Here is a comparison of the old kennel and the new one.
With a 3 month old at home we have a large supply of baby  safety equipment and used the cabinet door locks as the way to secure it. The upper cabinet was installed as a liquor cabinet.
Final finished project! Dog loves it and I love how it makes the house look. A great DIY for any beginner.

Saturday, February 11, 2012

I need to de-stress

With work & school keeping me super busy I have been stressed lately and decided to take today to de-stress by doing my favorite thing: CRAFTS!!!!
I have an old pair of heels that I love too much to throw away but they are too beat up to wear out.So I decided to give them a make-over.
I picked out my favorite color extra fine glitter mixed it with mod podge and painted over my entire shoe
Then sprinkled glitter over entire shoe with a nice coat of the extra fine glitter
I let them dry completely, my fiance suggested spraying a clear coat on them to make sure the glitter stays put so I did just that.

Now I am ready for girls night out next week!!!!!!!!!!! I am super excited to take my made over shoes out for a night on the town. The best part is that unlike new shoes they are already broken in.

Monday, February 6, 2012

BBQ Hawaiian chicken

My fiance loves pineapple, I on the other hand am not a huge fan of pineapple when its cooked. But decided to try to make him a batch. I started with the following:

4 frozen chicken breasts
1 can of pineapple tidbits drained
9oz original BBQ sauce
6oz honey BBQ sauce
put all in crock-pot on low for 8 hours or high for 4 hours.
My fiance said it tasted AMAZING! and I needed to add it to our menu rotation. I like to make per-portioned meals for him and freeze for him to eat when he is away since he is still on active duty and stationed in Georgia.

Boss chicken nacho dip

Boss chicken nacho dip is so easy to make and will disappear soooo quick. I had seen a recipe for this somewhere I'm sure on pinterest but for the life of me I can't seem to find it again to know what it is called so I asked my fiance and son what we should call it as we sat at the dinning room table eating a bowl of it. My fiance suggested Boss chicken and my son suggested nacho dip so of course I combined the two and voila! Now for the recipe.

4 frozen chicken breasts
16 oz jar of your favorite salsa (I like to use HOT)
1 can of corn drained
1 can of black beans drained
1 pkg of cream cheese
Put everything in the crock-pot and cook on low for 8 hours or high for 4 hours. Pull chicken out of crock-pot and shred then place back in crock-pot and stir. Place lid back on for at least 30 minutes then it will be ready to serve. We like to eat it with a bag of chips but it is good on rice too!!!
ENJOY!!!! It wont last long.

Time to shake things up! Flip a coin day

Between work, school, family functions, and errands we have been super busy with no time to relax on the weekends. When I realized this past weekend we had zero plans on Saturday I wanted to come up with something fun for my fiance, son, and I to do. I came up with a couple of ideas that would be fun and checked the weather to make sure outside activities were safe. I wanted to come up with a fun way to let the guys pick what we would do without arguing and complaining. I found small note-cards with envelops in the sale bin at a craft store for a dollar.
          I narrowed it down to two options per activity. Breakfast card had an A option and a B option I asked them each to pick a letter and if they agreed I would open the envelope and we would have the breakfast option they choose. But, if they disagreed I would choose which option would be heads and which would be tails and flipped a coin .
         Next was the activity note-card again two different options we ended up playing miniature golf.
         My son gets free meal coupons from school for honor roll so I decided lunch that day would be free but what we had to drink would be determined by the note-card.
         Now comes the BONUS card option, if everything is done per the decision card and there was no complaining the BONUS card is the finally for the day. A special treat for playing together as a family <3 We ended up with ice cream after a day of fun.. For any other decisions that were not covered on the cards we used the coin to determine our choice. Since I made the cards I was in charge of the coin flipping.
         My fiance and son loved it so much they want a mandatory "Flip a coin day" once a month. You can put anything on the cards and it doesn't even have to be an activity that costs money. A trip to the park to play Frisbee or soccer.Makes for a great family day can't wait until next months flip a coin day.